
Car Audio Installation: The Complete Guide
One of the most common questions we hear is some version of the same thing: can I install this myself or do I need to bring it in? The honest answer is that it depends on what you are installing, how comfortable you are with basic wiring, and how much time you are willing to invest. Some installs are genuinely straightforward and within reach for most people with a little patience. Others are more involved and the cost of a professional install is money well spent.
This guide covers the full picture: what every type of install involves, what tools you need, what trips people up, when to go the DIY route, and when to bring it to a shop.
What Tools Do You Need for a Car Audio Install?
Before you pull a single panel off your vehicle, having the right tools makes the difference between a clean install and a frustrating afternoon. Here is what you need for most jobs:
Trim removal tools are the most important thing on this list. These are plastic pry tools that let you pop door panels and dash trim without scratching or cracking them. Never use metal screwdrivers to remove interior trim. You will regret it.
A wire stripper and crimping tool is essential for any job that involves making wire connections. Clean, properly crimped connections are more reliable than twisted wire wrapped in tape and they last significantly longer.
A multimeter lets you test for power, ground, and continuity. If you are doing any wiring work and something does not sound right after the install, a multimeter tells you exactly where the problem is without guessing.
Tesa tape and wire loom protect your connections and keep your wiring organized and safe from chafing against metal edges inside your doors and under your dash.
A panel removal toolkit, a set of Torx and Phillips screwdrivers, and a drill with appropriate bits cover the mechanical side of most installs.
For amplifier installs specifically you will also need a drill and bit for running the power wire through the firewall, wire loom for protecting the power wire run, and a ring terminal set for making clean connections at the battery and ground point.
Amp wiring kit sizing guide
How to Install a Head Unit
A head unit install is one of the most approachable projects in car audio and a great starting point if you are new to DIY installs.
The basic process starts with disconnecting your vehicle's negative battery terminal before touching anything electrical. From there you remove the factory dash trim around the stereo using your trim tools, unscrew the factory head unit from its mounting bracket, and unplug the wiring harness and antenna connector from the back.
The key components you need beyond the head unit itself are a wiring harness adapter that connects your new head unit's wiring to your vehicle's factory harness without cutting any wires, a dash kit that fills the gap around the new unit if it is a different size than the factory opening, and if your vehicle has steering wheel controls, a steering wheel control interface module. Depending on your vehicle, you could also need an antenna adapter to keep the factory antenna working for AM/FM.
Connect the wiring harness adapter to your new head unit following the color code, plug in the antenna and any RCA outputs you are running to an amplifier, slide the unit into the dash, test everything before reassembling, and put your trim back together.
The stuff that trips people up: not checking the mounting depth before buying a head unit and finding it contacts the HVAC ducting behind the dash, forgetting to order a steering wheel control interface and having to wait for one to arrive before finishing the job, and CANBUS systems in newer vehicles that require additional interface modules to make the head unit communicate with the car properly.
Car stereos and head units: the complete guide
Single DIN vs double DIN: what fits your car?
What is a steering wheel control interface?
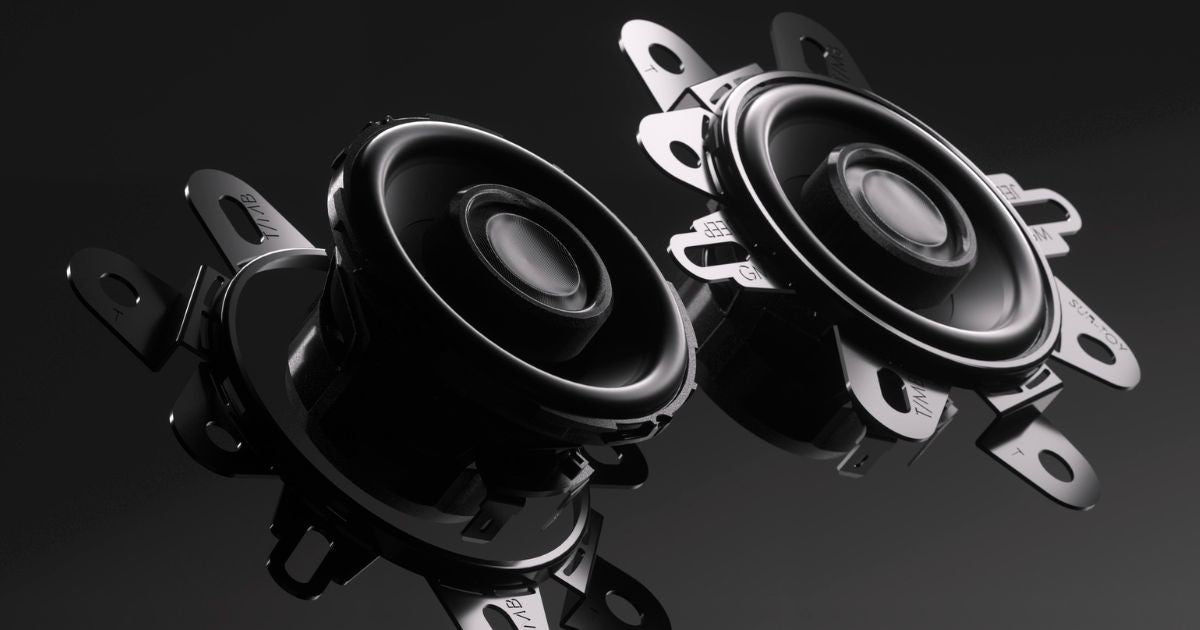
How to Install Car Speakers
A basic door speaker swap is one of the easiest installs you can do. The general process is the same across most vehicles: remove the door panel, unplug and unscrew the factory speaker, connect your new speaker using a wiring harness adapter or by splicing into the existing wires, test for sound before reassembling, and put the door panel back on.
A few things that make a real difference in the final result:
Sound deadening on the inner door skin before you reinstall the speaker gives the driver a much better acoustic environment to work in. It reduces road noise coming through the door and eliminates the rattling that cheap doors produce when the bass hits. It takes an extra hour but the improvement is noticeable.
Speaker baffles or foam gaskets create an airtight seal between the speaker and the door panel, which meaningfully improves bass response from the speaker. Most quality speaker installations include these.
For component speakers the install is more involved because the tweeter needs to be mounted separately, typically in your A-pillar, sail panel, or factory tweeter location, and the external crossover needs to be mounted inside the door or nearby. None of it is beyond a capable DIYer but it takes more planning and roughly twice the time of a coaxial swap.
Car speakers: the complete buying guide
How to install door speakers
Sound deadening guide for cars
How to Install a Car Amplifier
An amplifier install is the most involved of the common car audio projects and the one where proper technique matters most. Done right it is clean, safe, and sounds excellent. Done wrong it can cause electrical problems, noise in the system, or in extreme cases fire.
Here is the process broken down:
Plan your layout first. Decide where the amp is going, where the power wire will run from the battery, and where you will ground the amp. The ground point should be bare metal as close to the amplifier as possible, not a painted surface and not a long run to the chassis. A bad ground is the single most common cause of problems in an amplifier install.
Run the power wire from the battery through the firewall to the amplifier location. Use a grommet or loom wherever the wire passes through a metal hole to protect it from chafing and shorting against the chassis. Install an inline fuse within 18 inches of the battery connection. This fuse protects your wiring in the event of a short and is not optional.
Run your RCA cables from the head unit to the amplifier location. Keep these away from the power wire as much as possible, running them down the opposite side of the vehicle if you can. RCA cables running parallel to a power wire is the most common cause of alternator whine and noise in a car audio system.
Run a remote turn-on wire from the head unit's remote output to the amplifier's remote input. This tells the amplifier to turn on and off with the head unit so it is not drawing power when the car is off.
Connect your speaker outputs to the appropriate channels, set your gain and crossover controls correctly, and test the system before buttoning everything up.
Car amplifiers: the complete guide
Best mono amplifiers for subwoofers
How to set amp gain the right way
Amp wiring kit sizing guide
How to Install a Subwoofer
Installing a subwoofer means installing two things: the subwoofer in its enclosure and the amplifier that powers it. The amp install process is covered above. Here is what is specific to the subwoofer side:
The enclosure goes in first. Whether you are using a generic box, a loaded enclosure, or a custom build, position it in the trunk or cargo area where it fits cleanly and will not shift around. A subwoofer box that moves under heavy acceleration or braking will eventually damage the wiring connections and is annoying to listen to besides.
Wiring the subwoofer to the amplifier is straightforward: connect the positive and negative terminals on the subwoofer to the corresponding speaker output terminals on the amp, observing correct polarity. If you are running dual voice coil subwoofers or multiple drivers, the wiring configuration you choose determines your final impedance load, which needs to match what your amplifier is stable at.
Once everything is connected, set the amplifier's low pass crossover to filter out frequencies above what the subwoofer is designed to handle, typically somewhere between 80 and 120 Hz depending on your system, and set the gain correctly to match the output level of your head unit.
Subwoofers: the complete buying guide
How to wire subwoofers: series vs parallel
Ported vs sealed enclosure: which is right for you?
The Electrical System: What You Need to Know
Every amplifier draws current from your vehicle's electrical system. For modest systems this is not an issue. For more powerful builds you need to think about whether your electrical system can support the load you are adding.
The Big 3 upgrade is the most impactful electrical improvement you can make to support a car audio system. It involves replacing three key cables in your vehicle's electrical system with heavier gauge wire: the alternator to battery positive cable, the battery negative to chassis ground cable, and the engine block to chassis ground cable. Upgrading these three cables allows more current to flow freely throughout the system and significantly reduces voltage drop under heavy load. If you are running more than 500 watts total and you notice lights dimming when the bass hits, this is the fix.
For very high powered systems a dedicated second battery or a high output alternator may also be worth considering. These are not everyday needs but for serious builds they make a meaningful difference in system stability.
Big 3 electrical upgrade guide
How to fix ground loop noise
Common Problems and How to Fix Them
Alternator whine or ground loop noise is a high pitched whine that follows your engine RPM and comes through the speakers. It is almost always a grounding issue or RCA cables running too close to power wires. Check your amplifier ground first, then look at your RCA routing.
No sound from one channel is usually a blown fuse, a loose speaker connection, or a crossover setting that has accidentally cut the signal to that channel. Check your fuses first, then your connections, then your amp settings.
Subwoofer not hitting hard despite everything being connected is almost always a gain setting issue. If the gain is set too low the amp is not receiving a strong enough input signal to produce full output. Set your gain correctly and the difference is immediate.
Amp going into protection mode means the amplifier has detected a condition that could damage it and shut itself down. The most common causes are a speaker wire shorting against a metal surface, an impedance load below what the amp is rated for, overheating from inadequate airflow around the amp, or a bad ground connection.
Head unit losing memory or resetting is almost always a wiring issue where the constant 12V memory wire was connected to a switched power source that cuts off when the ignition is off. Verify your wiring harness connections against the color code for your vehicle.
Amp goes into protection mode: causes and fixes
How to fix ground loop noise
DIY vs Professional Installation: The Honest Take
Most basic installs, a head unit swap, a speaker replacement, or a simple amp and sub setup, are genuinely within reach for someone who is patient, methodical, and willing to do a bit of research. The tools are not expensive, the information is available, and the satisfaction of doing it yourself is real.
Where professional installation earns its cost is in vehicles with complex factory systems, builds that involve running wires through tight or difficult spaces, any system where DSP tuning is part of the goal, and situations where the time and frustration of doing it yourself is worth more than the labor cost. A professional installer also takes responsibility for the work. If something is not right they fix it.
Our install team has done thousands of these jobs across every type of vehicle. If you are not sure whether your project is a good DIY candidate or you want it done right the first time, reach out and we can give you an honest answer.
DIY vs professional car audio installation
How much does a car audio install cost?
Frequently Asked Questions
How long does a car audio install take? A basic head unit swap typically takes one to two hours. A speaker replacement is usually one to two hours depending on the number of speakers and the vehicle. An amplifier and subwoofer install ranges from two to four hours for a straightforward setup. A full system build with multiple amplifiers, speakers, and custom work can take a full day or more.
Will installation void my car warranty? In most cases no. The Magnuson-Moss Warranty Act prevents manufacturers from voiding your warranty simply because an aftermarket part was installed, unless they can demonstrate the part caused the specific issue in question. A clean professional installation very rarely creates any problems with a factory warranty.
What gauge power wire do I need for my amplifier? The right gauge depends on the amplifier's current draw and the length of the wire run. As a general rule, 0 to 4 gauge wire handles high powered systems, 4 to 8 gauge covers mid-powered setups, and 10 to 12 gauge is appropriate for smaller amplifiers. When in doubt go heavier rather than lighter. Undersized wire is a fire risk and a performance limiter.
Will aftermarket car audio void my warranty?
How long does a car audio install take?
Amp wiring kit sizing guide
Get Your System Installed at San Diego Car Stereo
If you want the job done right without the hassle, our install team is ready to help. We have put systems into thousands of vehicles across every make and model and we stand behind every install we do. Whether you are starting from scratch or adding to an existing system, bring your vehicle in and we will take care of the rest.

Leave a comment
All comments are moderated before being published.
This site is protected by hCaptcha and the hCaptcha Privacy Policy and Terms of Service apply.